Become a Compost Commander with this simple DIY compost project. Join us as we watch food scraps transform into nutritious garden soil, just in time for summer!
What You Need:
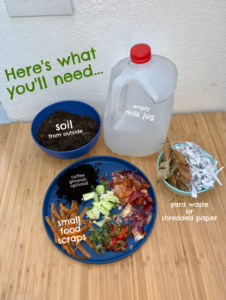
- 1 Empty Milk Jug or Two Liter Plastic Bottle
- Scissors
- Compost Material (fruit, vegetable peelings, coffee grounds, chopped leaves, grass clippings, etc.)
- Soil (enough to fill a layer at the bottom of your container)

Directions:
- Rinse out an empty milk jug or two liter plastic bottle. Put the cap back on.
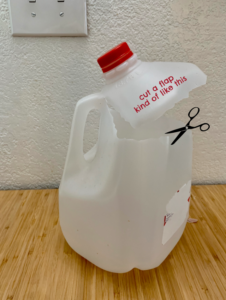
- (With the help of an adult) Cut a flap around the top of the jug large enough so you can reach a stick or spoon inside to stir the compost.
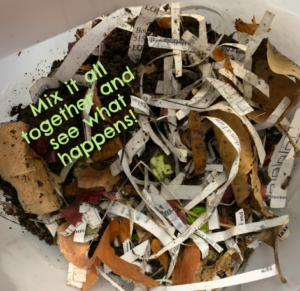
- Collect SMALL food scraps like fruits and vegetable peelings, greens, and coffee grounds. Chopped leaves, grass clippings, and shredded paper may also be used. Cut or tear your scraps into smaller pieces if necessary.
- Spread a layer of soil on the bottom of your container. Note: use soil from outside rather than potting soil since it contains bacteria that will aid in composting.
- Add your food and yard scraps. Cover with another thin layer of soil. Sprinkle or squirt the mixture with a little water if it looks dry. Do NOT soak the compost mixture, this will lead to mold.
- Continue to add about equal parts food and yard waste for the next two weeks or until your container is close to full.
- Stir the mixture every day, adding a little more water if it looks dry or letting the flap stay open if it looks too wet.
- Once your container is full, do not add anything else. Continue to stir the compost every day. Add a little water if it dries out.
- Your compost should turn into brown soil about 7-10 weeks after you stop adding new material. Once the composting process is complete, you may mix the soil in with your container plants or directly into your garden


